After connecting a microcontroller to a Palm m100, I had the idea to bring some data to the Palm via the microcontroller's Wi-Fi interface.
The m100 can "talk" PPP, so the most ideal solution would be a PPP-Server on the D1 mini.
There are some projects on GitHub that achieve this in some way, but I wasn't able to get any of them running:
Maybe in the future, I can dig into one of these projects and modify them to access the internet directly from the Palm over the D1 mini. For now, I was looking for an easier solution.
Instead of overthinking everything, I received advice from a Discord user to take a few steps back and begin small.
A wired internet connection for the Palm m100
The new goal was to bring the m100 online via a wired serial connection to a Linux machine.
This isn't hard since you only need a few commands. I did this on Ubuntu 20.04 LTS, but it should work similarly on other distributions:
First, you need to know the name of the Ethernet device and the local IP.
The output of
ifconfig -a
is helpful, which looks like this:
user@thinkCentre:~$ ifconfig -a
enp0s31f6: flags=4163  mtu 1500
        inet 192.168.0.234  netmask 255.255.255.0  broadcast 192.168.0.255
        ether 60:20:99:0a:d5:90  txqueuelen 1000  (Ethernet)
        RX packets 659970  bytes 774014055 (774.0 MB)
        RX errors 0  dropped 5278  overruns 0  frame 0
        TX packets 213892  bytes 32920680 (32.9 MB)
        TX errors 0  dropped 0 overruns 0  carrier 0  collisions 0
        device interrupt 17  memory 0xf7100000-f7120000

lo: flags=73  mtu 65536
        inet 127.0.0.1  netmask 255.0.0.0
        inet6 ::1  prefixlen 128  scopeid 0x10
        loop  txqueuelen 1000  (Lokale Schleife)
        RX packets 5316  bytes 595665 (595.6 KB)
        RX errors 0  dropped 0  overruns 0  frame 0
        TX packets 5316  bytes 595665 (595.6 KB)
        TX errors 0  dropped 0 overruns 0  carrier 0  collisions 0
Since I don't have Wi-Fi or any other related interfaces on my machine, it was relatively easy to identify the right one:
enp0s31f6
But even with more interfaces, there should only be one with an IPv4 inet address.
The needed local address in my case is:
192.168.0.234
This script executes the required iptables commands and at the end, the actual pppd command, which establishes the connection to the m100:
#!/bin/bash

echo 1 > /proc/sys/net/ipv4/ip_forward
iptables -A INPUT ! -i enp0s31f6 -j ACCEPT
iptables -A INPUT -m state --state ESTABLISHED,RELATED -j ACCEPT
iptables -t nat -A POSTROUTING -o enp0s31f6 -j MASQUERADE

/usr/sbin/pppd ttyUSB0 9600 local noauth 192.168.0.234:192.168.0.77 ms-dns 192.168.0.71 passive updetach asyncmap 0
In the first, second, and fourth iptables commands, the interface name ("enp0s31f6") needs to be replaced.
Also, in the pppd command, all IP addresses need to be replaced:
- 192.168.0.234: this is the "inet" address from the "ifconfig -a" command.
- 192.168.0.77: this is a random, but free address in the local network.
- 192.168.0.71: this is a DNS. 8.8.8.8 for Google's DNS should work, too.
"ttyUSB0" is the interface from the Linux machine to the Palm. I used a serial-to-USB cable, so it shows up in
sudo dmesg
as "ttyUSB0" after the adapter was plugged into the PC:
[ 7501.198317] usb 1-1.3: new full-speed USB device number 8 using xhci_hcd
[ 7501.403471] usb 1-1.3: New USB device found, idVendor=067b, idProduct=2303, bcdDevice= 4.00
[ 7501.403484] usb 1-1.3: New USB device strings: Mfr=1, Product=2, SerialNumber=0
[ 7501.403489] usb 1-1.3: Product: USB-Serial Controller D
[ 7501.403494] usb 1-1.3: Manufacturer: Prolific Technology Inc.
[ 7501.478405] usbcore: registered new interface driver usbserial_generic
[ 7501.478430] usbserial: USB Serial support registered for generic
[ 7501.482783] usbcore: registered new interface driver pl2303
[ 7501.482809] usbserial: USB Serial support registered for pl2303
[ 7501.482853] pl2303 1-1.3:1.0: pl2303 converter detected
[ 7501.484300] usb 1-1.3: pl2303 converter now attached to ttyUSB0
[ 7502.117843] kauditd_printk_skb: 86 callbacks suppressed
(Second line from bottom shows the needed port name, "ttyUSB0".)
When the script is running, it is waiting for a connection:
user@thinkCentre:~/Desktop$ sudo bash palm-ppp.sh
Using interface ppp0
Connect: ppp0 <--> /dev/ttyUSB0
Before a connection can be established, some configuration needs to be done on the m100.
First, in "Preferences," select "Connection":
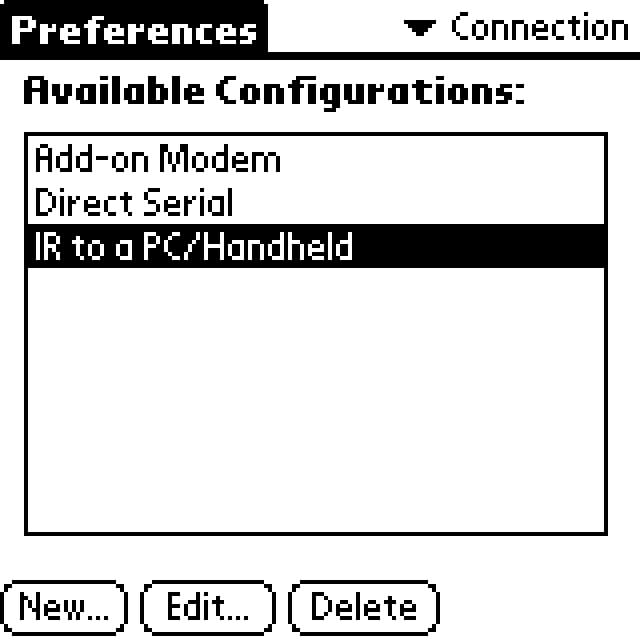
Here, we need to add a new configuration as shown:
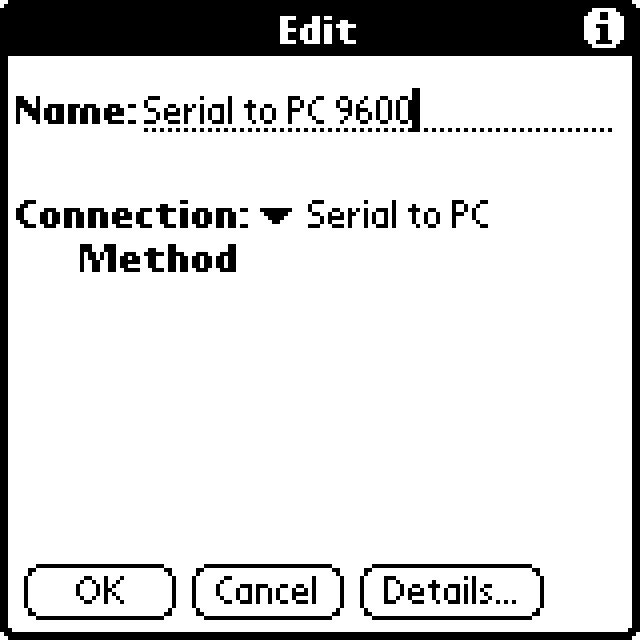
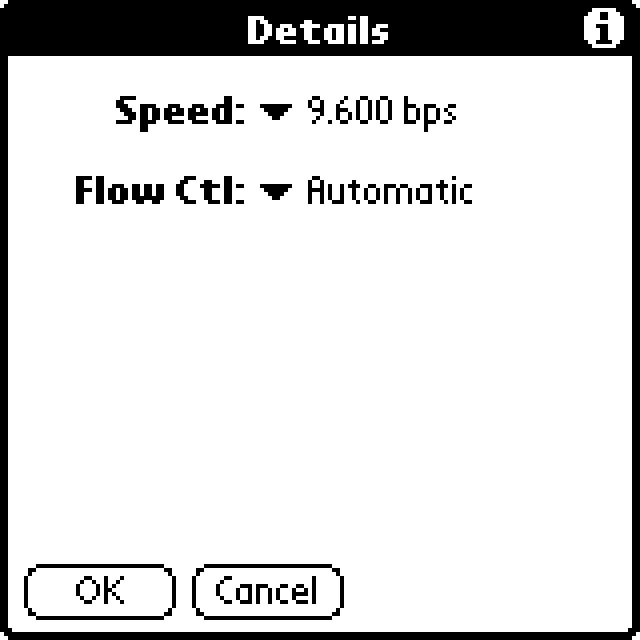
The name can be anything, but in "Details..." the Speed needs to be set to "9.600 bps". It is possible to use more when using a wire, but later we are stuck with 9600 bps.
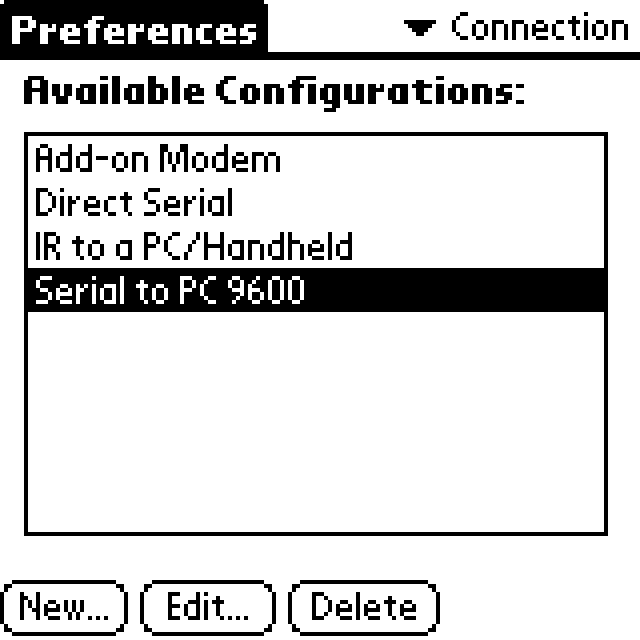
At the end, it should look like this:
Next, select "Network" in the Preferences menu:
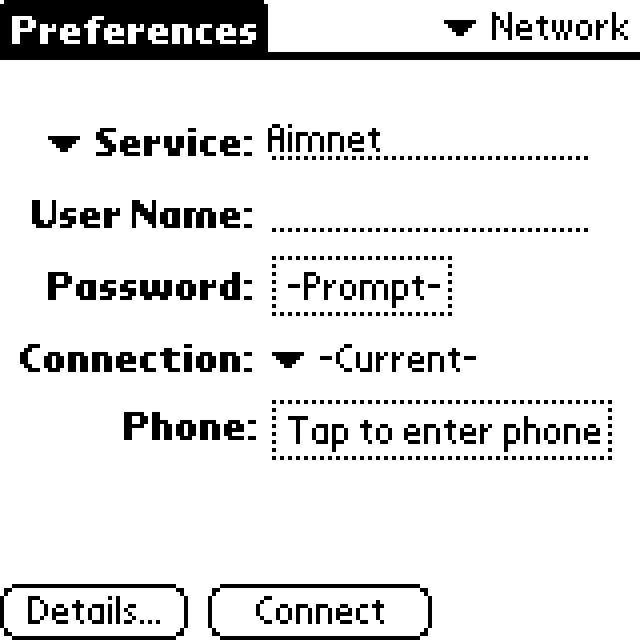
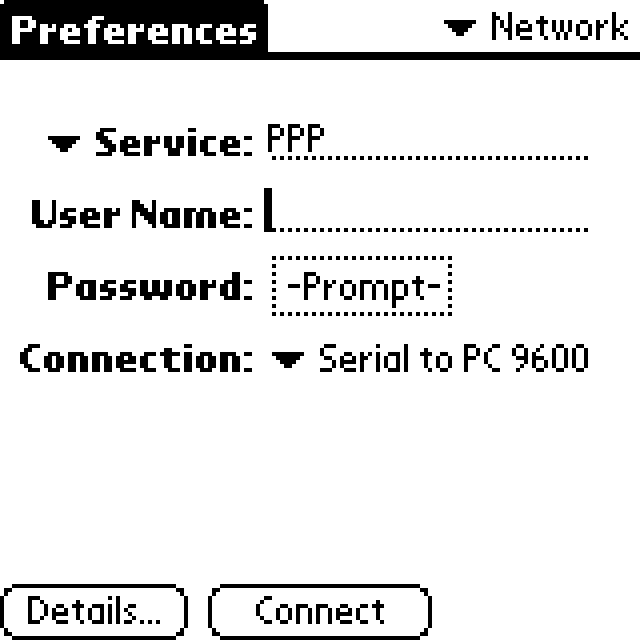
The "Service name" can be anything. The User Name is blank and the Password needs to be shown as "-Prompt-". Connection, the last point, is our newly created configuration:
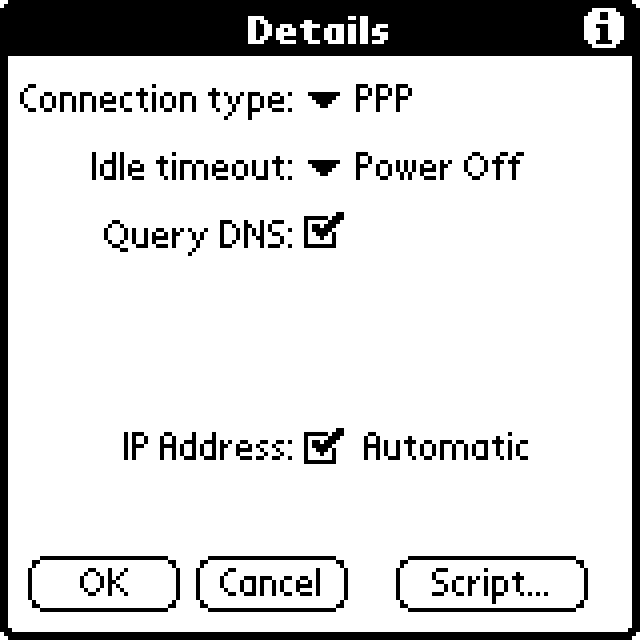
The (Network) "Details..." look like this:
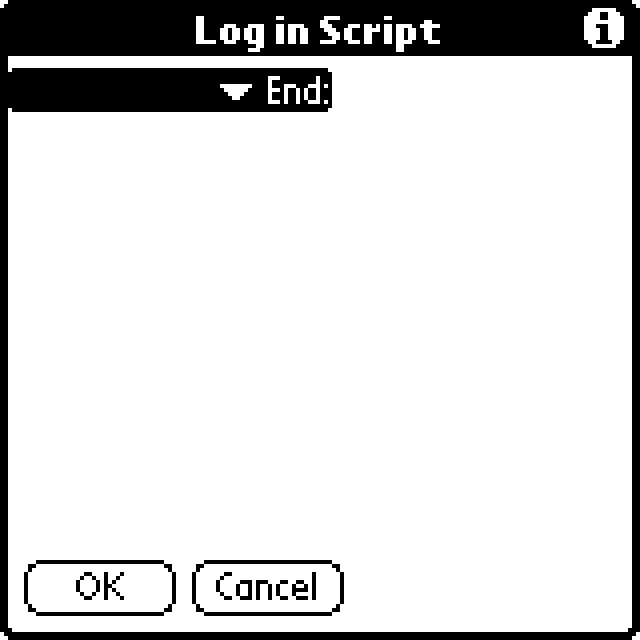
And the "Script..." is just "End:":
Now, everything is set up. The m100 is connected via the serial cable to the Linux machine via a serial-to-USB adapter cable, "palm-ppp.sh" is running, and shows "Connect: ppp0 <--> /dev/ttyUSB0".
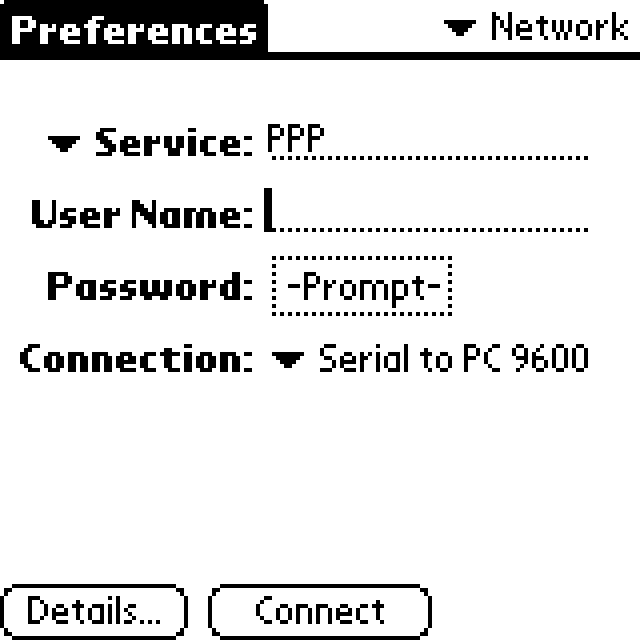
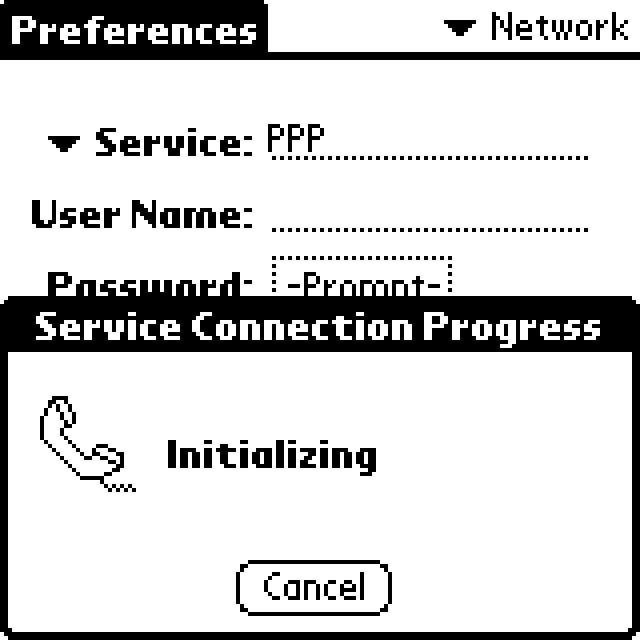
After hitting "Connect," the connection will be established, as shown here:
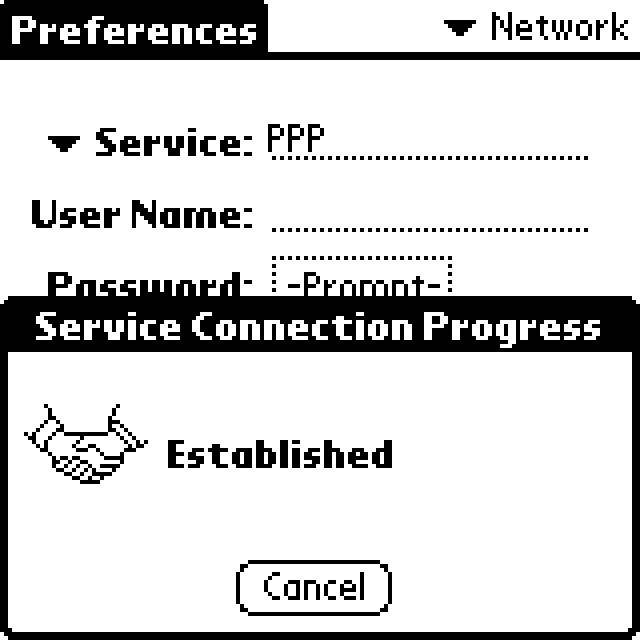
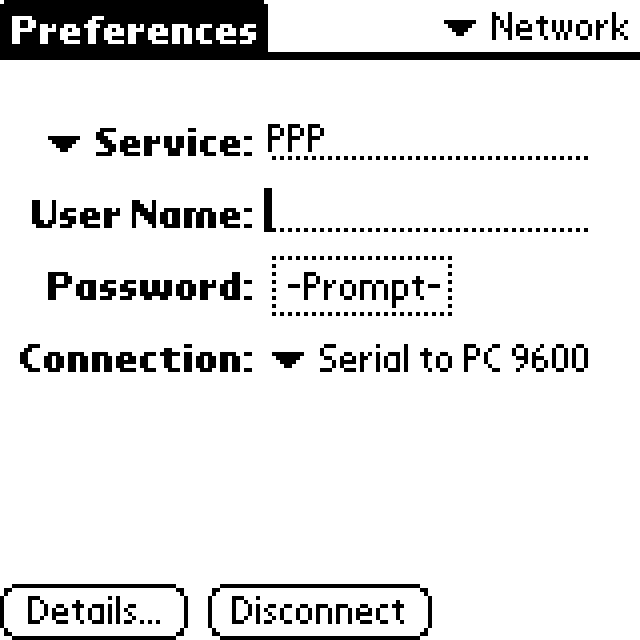
When it is established, a few pixels should flash in the upper right corner of the m100 and the "Connect" button now shows "Disconnect":
The connection was successful and "Xiino" or "EudoraWeb" can be used to surf the internet. But beware of two facts:
- The connection is quite slow, even for a 16MHz PDA, so only small text-only websites should be used, like this Palm-ready demo webpage: http://light.palm2000.com (via Internet Archive)
- The modern web uses a lot of features that aren't supported by such small and old browsers, so don't expect something like YouTube or eBay to work.
A wireless internet connection for the Palm m100
The next step was to replace the serial cable with a wireless solution, which should look like this:
Palm (Serial) <=> ESP8266 <=> Wi-Fi <=> Router <=> Wi-Fi <=> ESP8266 <=> Serial-USB-Adapter <=> Linux-Machine with pppd
As mentioned before, this isn't the most optimal/elegant solution, but it is a solution to bring internet wirelessly to the Palm m100.
It requires a pppd server, which is always on when the m100 wants to go online. But since it can be run on a Raspberry Pi, it is acceptable.
Since the Palm is already configured for an internet connection, and the pppd is running, we just need to replace the serial cable.
On the Palm side, the already installed D1 mini is used for the serial-to-Wi-Fi bridge and on the other side, an ESP8266 (NodeMCU V3) is used for the Wi-Fi-to-serial bridge.
So just the code for the D1 mini on the m100 (secondary) and the ESP8266, which will be connected to the Linux machine (main) is needed.
The code for the ESP8266 looks like this:
#include
#include

const char *ssid = "MySSID";
const char *pw = "MySecurePassword";

#define BAUDRATE 9600
#define TCP_PORT 8880


WiFiServer server(TCP_PORT);
WiFiClient tcpClient;


uint16_t dataCounter = 0;


int roundCounterS = 0;
int roundCounterT = 0;

void setup() {

  delay(500);

  Serial.begin(BAUDRATE);

  WiFi.mode(WIFI_STA);
  WiFi.begin(ssid, pw);

  while (WiFi.status() != WL_CONNECTED) {
    delay(500);
  }

  server.begin(); // start TCP server
  server.setNoDelay(true);

}


void loop()
{
  if(!server.hasClient() &&  !tcpClient.connected()){

    while(!server.hasClient()) {
      delay(1000); // We need to wait, until the client has connected
    }

    if (tcpClient && tcpClient.connected()) {
      tcpClient.stop();
    }
    tcpClient = server.available();

  }

  yield();

  while(tcpClient.available()) {
    Serial.write(tcpClient.read());
  }

  yield();

  while(Serial.available()) {
    tcpClient.write(Serial.read());
  }

  yield();
}
The sequence is quite simple:
- A Wi-Fi connection is established.
- A TCP Server waits for a client (the m100) to connect.
- When the client is connected, the TCP server simply reads all data from the TCP connection and writes it to the serial connection ...
- ... then the data from the serial connection is written to the TCP connection.
Since the ESP8266 has only one CPU core, everything, including Wi-Fi, is handled by it. If the code takes too much CPU time in one step, the ESP8266 can crash. The "delay()" or "yield()" calls give some time to other components and prevent the ESP8266 from crashing.
The code can be uploaded to an ESP8266 (in my case, a NodeMCU V3) and connected to the Linux machine, which runs "pppd" (via the bash script from above). Ensure that the ESP8266 is connected as "ttyUSB0", or change the bash script to the correct USB port name.
(Connect the ESP8266 to the Linux machine first, then start the bash script.)
The IP address of the ESP8266 is needed, which should be found in the router where the ESP8266 is connected. In my case, it is "192.168.0.111".
The script for the D1 mini looks quite similar:
#include
#include
#include "SoftwareSerial.h"
#include

const char *ssid = "MySSID";
const char *pw = "MySecurePassword";

#define BAUDRATE 9600
#define TCP_PORT 8880


WiFiClient tcpClient;

IPAddress master(192,168,0,111);     // IP of the Main-Device

SSD1306  display(0x3C, D2, D1);
SoftwareSerial softSerial(D4, D3); // RX, TX

void setup() {

  delay(500);

  display.init();
  display.clear();
  display.flipScreenVertically();

  softSerial.begin(BAUDRATE);

  display.drawString(0, 0, "Starting Wifi");
  display.display();

  WiFi.mode(WIFI_STA);
  WiFi.begin(ssid, pw);

  while (WiFi.status() != WL_CONNECTED) {
    delay(500);
  }

  display.drawString(0, 15, "Setup OK");
  display.display();
}


void loop()
{

  if(!tcpClient.connected()){

    display.drawString(0, 30, "Looking for a Server");
    display.display();

    while (!tcpClient.connect(master, TCP_PORT)) {
      delay(100);
    }

    display.drawString(0, 45, "Server Connection OK");
    display.display();
    delay(2000);
    display.clear();
    display.display();

    display.drawString(0, 0, "Data transmission ongoing...");
    display.display();
  }

  yield();

  while(tcpClient.available()) {
    int tb = tcpClient.read();
    softSerial.write(tb);
  }

  yield();

  while(softSerial.available()) {
    int sb = softSerial.read();
    tcpClient.write(sb);
  }

  yield();
}
The sequence is very similar to the one for the ESP8266:
- A Wi-Fi connection is established.
- The TCP Server connects to the ESP8266.
- When the connection to the ESP8266 is successful, the TCP server reads all data from the TCP connection and writes it to the serial connection ...
- ... then the data from the serial connection is written to the TCP connection.
Since no flow control is used, the maximum bit rate is limited to 9600 bits/s. I have already added some wires to the CTS, RTS, and DTR pins of the m100 to improve this project. But currently, I have no time for this, and I'm happy that it is running at 9600 bits/s (around 1KB/s).
Here is the m100 in action with a wireless page load of http://light.palm2000.com (via Internet Archive):
(Video is without sound.)